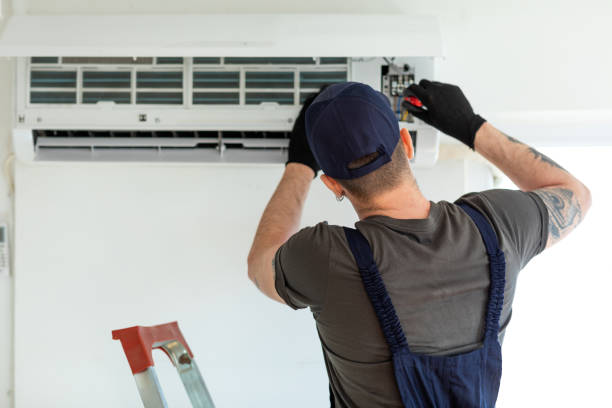
Making the decision to repair or replace your air conditioning system can feel overwhelming, especially if it’s not functioning efficiently. Being proactive about the condition of your HVAC system can save you from costly emergency repairs and ensure your home remains comfortable year-round. Here’s how to determine whether repairing or replacing your AC is the best choice.
Factors to Consider Before Deciding
- Age of the System: The average lifespan of an air conditioner is 10–15 years. If your system is nearing or beyond this range, replacement might be more cost-effective in the long run. Older systems are likely to encounter frequent breakdowns, higher energy bills, and outdated technology.
- Repair Costs vs. Replacement Costs: A good rule of thumb is if repair costs exceed 50% of the price of a new unit, replacement might be the better option. Investing in frequent repairs for an aging unit could result in significantly higher expenses over time.
- Energy Efficiency: Older units are typically less efficient than modern models. Upgrading to a more energy-efficient system may result in lower utility bills and reduced environmental impact. Look for systems with high SEER (Seasonal Energy Efficiency Ratio) ratings for maximum efficiency.
- Frequency of Repairs: If you’re calling a technician multiple times a year for issues like refrigerant leaks, motor failure, or electrical malfunctions, it’s likely time to consider replacing the unit.
When Repairing Might Be Enough
- Your unit has been well-maintained and is under ten years old.
- The issue involves minor components such as capacitors or thermostats that are inexpensive to fix.
- The system’s performance hasn’t significantly declined.
Signs It May Be Time to Replace Your AC
- Rising Energy Bills– A consistent increase in energy consumption despite routine maintenance signals declining efficiency.
- Uneven Cooling– Struggling with hot spots around your home? This indicates poor performance that might not improve with repairs alone.
- Loud Noises– Grinding, squealing, or banging sounds often point to serious internal damage that may justify upgrading.
- Frequent Breakdowns– Constant issues disrupt comfort and drain finances over time.
- Outdated Refrigerant– Systems using R-22 refrigerant (phased out due to environmental concerns) should be replaced with newer models utilizing eco-friendly alternatives like R-410A.
Cost Comparison: Repair vs Replacement
| Decision Factor | Repair | Replace |
| Initial Cost | Lower upfront cost | Higher upfront investment |
| Long-Term Savings | Limited savings due to inefficiency | Significant savings via lower energy bills |
| Environmental Impact | Continues reliance on older tech | Improved eco-friendliness |
| Lifespan | Extends life briefly | Longer operational lifespan |
Prioritize Preventative Maintenance
Regardless of whether you choose repair or replacement, ensuring regular maintenance prevents extensive wear and tear on your HVAC system. Schedule annual inspections by certified professionals and replace filters every 1–3 months during peak usage periods.
By carefully evaluating these factors and staying ahead of potential failures, homeowners can make an informed decision about their air conditioning system while minimizing unexpected expenses.
6 Clear Signs You Need to Call an AC Repair Company Orlando FL for Immediate Help
An air conditioning system is an essential part of maintaining comfort in your home or office. However, like any other mechanical system, it can develop problems over time. Knowing when to repair or replace your AC system can save you from costly breakdowns and ensure a reliable cooling experience. Here are six clear signs that indicate it’s time to take action.
If you notice weak or inconsistent airflow coming from your vents, this could be a sign of several issues:
– A clogged air filter restricting airflow
– Ductwork leaks causing air loss
– A failing blower motor struggling to distribute air efficiently
Reduced airflow not only compromises comfort but also forces the system to work harder, leading to higher energy bills and potential damage if left unaddressed.
Are you constantly calling your HVAC technician? If repair costs are mounting up, it might make more financial sense to replace the unit entirely.
| Age of Unit | Cost of Repairs | Recommendation |
| Less than 10 years | Less than $500 | Repair may suffice |
| Over 10 years | More than $500 | Consider replacing the unit |
Frequent repairs could indicate that the system is nearing the end of its lifespan and replacing it might provide long-term savings.
Have you noticed a sudden spike in your energy bills? An inefficient AC system often consumes more electricity as it struggles to maintain desired temperatures.
– Aging components losing efficiency
– Refrigerant issues reducing cooling performance
– Poor maintenance leading to dirt buildup in coils
Upgrading to a modern, energy-efficient model can significantly reduce utility costs.
If certain rooms are too cold while others remain warm, this is another sign your AC isn’t working properly.
– Improperly sized equipment for your space
– Malfunctioning thermostat settings
– Issues with ductwork distribution
Uneven cooling can affect overall comfort and should be addressed promptly by an HVAC professional.
Unusual sounds like grinding, squealing, or banging often point toward internal mechanical problems such as:
– Worn-out belts
– Loose components
– Failing motors
Similarly, unpleasant odors may indicate mold growth in ducts or burnt wiring inside the unit—both requiring immediate attention for repair or replacement.
Most air conditioning systems have an average lifespan of around 10–15 years with regular maintenance. If yours is approaching (or has surpassed) that age range, it may no longer operate efficiently compared to modern units designed with advanced technology and energy-saving features.
Benefits of Replacing an Aging System:
- Lower operational costs with improved efficiency ratings (SEER ratings)
- Enhanced comfort with better temperature control
- Environmentally friendly operation through reduced carbon footprint
Quick Tips for Finding Reliable Orlando, FL HVAC Service
Ignoring these warning signs might lead to complete system failure at an inconvenient time—like during peak summer heatwaves when HVAC technicians are busiest and replacement wait times increase significantly. Proactively addressing these issues ensures consistent comfort while avoiding unnecessary stress and expense down the road.
Be sure to consult with a licensed HVAC contractor who can diagnose these problems accurately and guide you toward informed decisions that fit within your budget.
Why Warm Air is Blowing from Your HVAC System: Insights from a Leading HVAC Company Orlando
When your HVAC system is supposed to be cooling your home but instead blows warm air, it’s a clear sign that something is wrong. Identifying the root cause early can save you time, money, and discomfort. Below, we explore common reasons for this issue and outline actionable steps to address it.
Common Reasons Your HVAC System Blows Warm Air
There are several potential causes behind a warm air issue in your cooling system.
- Refrigerant is essential for cooling. If levels are too low due to leaks or improper charging, your system won’t be able to cool effectively.
- Signs of low refrigerant include ice buildup on the unit and long cooling cycles.
- An improperly set or malfunctioning thermostat can trick your HVAC system into blowing warm air.
- Ensure the thermostat is set to “cool” and check the temperature setting.
- Clogged or dirty air filters restrict airflow, forcing the system to work harder and sometimes resulting in warm air output.
- Regularly replacing filters can prevent this issue.
- The compressor is responsible for circulating refrigerant through the system. If it fails, only warm or room-temperature air will blow out of your vents.
- Compressor issues often require professional repair or replacement.
- Faulty wiring or tripped circuit breakers may disrupt power to critical components in your HVAC system.
- Check breakers and consult an expert if electrical damage is suspected.
- Leaks in ductwork can allow cooled air to escape before reaching the vents, leaving only warm air circulating inside the house.
- A professional inspection can identify and seal these leaks effectively.
Steps You Can Take Immediately
- Check Your Thermostat Settings: Ensure it’s set correctly (cool mode) and functioning properly. Replace batteries if needed.
- Assess Circuit Breakers: Look for tripped breakers that might be cutting power to parts of your system.
- Clear Debris Around Outdoor Unit: Overgrown vegetation or debris around the outdoor compressor unit may obstruct airflow.
If none of these steps resolves the issue, contact an experienced HVAC technician for further diagnosis.

When Should You Call a Professional?
| Symptom | Possible Cause | Recommended Action |
| Ice forming on outdoor unit | Low refrigerant levels | Contact an HVAC technician |
| Loud banging noises | Compressor damage | Schedule immediate repairs |
| Short cycling | Electrical issues | Request professional inspection |
By addressing warm air problems early on and performing regular maintenance on your HVAC system, you’ll not only restore comfort but also extend its lifespan while improving energy efficiency within your home. Regular inspections by certified professionals further ensure continued performance year-round without unexpected failures during peak seasons.
Understanding Strange Noises and When to Seek Orlando Air Conditioning Repair
Unusual noises from your air conditioning (AC) system are not just a nuisance—they are often warning signs of underlying issues that may require immediate attention. Addressing these problems early can save costs on repairs and prevent the need for a full system replacement. Below, we’ll explore common noises, their potential causes, and how to approach repairs or replacements effectively.
Common AC Noises and Their Meanings
- Possible Cause: Loose or broken parts inside the compressor, such as connecting rods, pistons, or other components. A banging noise could also indicate that the outdoor unit’s fan blades are hitting an obstruction.
- Repair or Replace?: If a component is damaged but the compressor remains intact, repairs might suffice. However, if internal parts of the compressor are failing, replacement may be more cost-effective.
- Possible Cause: Refrigerant leaks often cause hissing sounds due to escaping gas under pressure. Alternatively, it could stem from a malfunctioning valve or ductwork leak.
- Repair or Replace?: Small refrigerant leaks can be repaired by sealing and recharging refrigerant levels. Persistent leaks may require replacing critical components.
- Possible Cause: Worn-out fan belts or motor bearings usually cause high-pitched squeals. Another potential issue is poor lubrication in moving parts.
- Repair or Replace?: Replacing belts or lubricating parts is typically sufficient. However, if wear extends to essential motor components, you might consider replacing the motor entirely.
- Possible Cause: Electrical issues such as failing capacitors, relays, or control boards can result in clicking noises during startup cycles.
- Repair or Replace?: Clicking sounds warrant inspection of electrical components first; targeted repairs generally address this issue unless there’s widespread electrical failure.
- Possible Cause: Buzzing often indicates electrical problems such as loose connections, degraded wiring insulation, faulty motors, or debris in contact with outdoor unit parts.
- Repair or Replace?: Electrical issues can typically be repaired unless severe overheating has damaged other system elements.
- Possible Cause: Loose screws/bolts in panels and ducts can lead to rattling sounds during operation.
- Repair Only Needed: Tightening hardware should resolve minor rattling-related issues without requiring part replacement.
When to Consider Full System Replacement
- If your AC system is over 10–15 years old and consistently noisy despite repeated repairs.
- Frequent breakdowns leading to escalating maintenance costs.
- Reduced energy efficiency resulting in higher-than-normal utility bills even after servicing efforts.
| Noise Type | Likely Issue | Repair/Replace Suggestion |
| Banging/Clanking | Loose fan blades/compressor failure | Repair minor; replace if compressor fails |
| Hissing | Refrigerant leak | Repair seal; replace if persistent |
| Squealing/Screeching | Worn belts/bearings | Repair unless motor damage exists |
| Clicking | Electrical faults | Inspect wiring; replace capacitors |
| Buzzing | Wiring issues/debris contact | Remove debris; repair faulty wiring |
Preventative Tips for Avoiding Noise Issues
- Schedule annual inspections by qualified HVAC contractors.
- Lubricate moving parts periodically to avoid wear and tear.
- Clear debris around outdoor condenser units regularly.
- Tighten screws/bolts during routine checkups.
By staying proactive with care and quickly addressing unusual sounds when they emerge, you can extend your air conditioning system’s lifespan while maintaining peak performance year-round.
How to Handle Water Leaking Issues from Your HVAC System Effectively
Water leaking from your HVAC system can cause significant damage to your home and indicate serious issues within the unit. Addressing leaks promptly is crucial for maintaining system efficiency and avoiding costly repairs. Below, we’ll explore the potential causes of water leaks, how to address them effectively, and when it’s time to call a professional.
Common Causes of Water Leaking from an HVAC System
- The condensate drain line removes excess moisture created by the cooling process.
- Older HVAC systems may have a rusted or damaged drain pan that fails to catch condensation effectively, leading to leaks.
- A clogged air filter restricts airflow over the evaporator coil, causing it to freeze. When the ice melts, it can overwhelm the drain pan and cause leakage.
- Low refrigerant levels can also lead to freezing on the evaporator coil. As with dirty filters, melting ice may result in water pooling or leaking outside the unit.
- An incorrectly installed HVAC system may have poor drainage alignment, leading to consistent water leaks during operation.
Steps for Addressing Water Leaks
- Turn Off Your System Immediately
Operating a leaking system can worsen damage or create safety hazards. - Check and Clean the Condensate Drain Line
Use a wet/dry vacuum or a plumbing snake to clear any blockages in the drain line. For preventative maintenance, flush it with a solution of vinegar and warm water periodically. - Inspect the Air Filter
- Examine the Drain Pan
Look for cracks or rust in your drain pan. If damaged, replace it immediately to prevent further leakage. - Ensure Proper Refrigerant Levels
If low refrigerant is suspected, contact an HVAC contractor immediately as handling refrigerants requires specialized training and certification. - Check for Proper Installation Alignment
Verify whether your system was installed correctly by inspecting its leveling and drainage setup—or consult a professional if unsure.
When It’s Time to Call an Expert
- Persistent water leaks despite troubleshooting.
- Visible ice buildup on evaporator coils.
- Unusual noises accompanying leaks.
- Issues with refrigerant levels necessitating recharging.
- Signs of electrical component damage (e. g. , wet wires).
Preventative Measures Table
| Maintenance Task | Recommended Frequency | Description |
| Change air filter | Every 1–3 months | Improves airflow and prevents coil freezing |
| Clean condensate drain line | Every 6 months | Prevents blockages that lead to pooling |
| Inspect drain pan | Annually | Detects rust or cracks before they worsen |
| Schedule professional service | Annually | Ensures optimal performance through inspections |
By understanding common causes of leaks in your HVAC system and addressing them promptly with proper maintenance practices or expert assistance where necessary, you can protect both your home and your investment in heating and cooling equipment efficiently over time.
The Importance of Addressing Weak Air Flow Output in Your Heating and Cooling System
Weak airflow is a common yet often overlooked issue in heating and cooling systems. While it may seem like a minor problem at first, it can lead to significant discomfort, increased energy bills, and potential long-term damage to your HVAC system. Understanding the importance of addressing weak airflow promptly can save you time, money, and hassle.
Common Causes of Weak Airflow in HVAC Systems
Several factors contribute to poor airflow in your heating and cooling system. Identifying the root cause is essential for resolving the issue effectively.
- Obstructed Ductwork: Blockages or leaks within the ductwork can prevent air from flowing freely.
- Malfunctioning Blower Motor: If the blower motor isn’t working correctly, it won’t push air through your system efficiently.
- Dirty Coils: Dusty evaporator or condenser coils can reduce overall system efficiency.
- Improperly Sized HVAC System: An HVAC unit that is too small or too large for your home can lead to inadequate airflow and uneven temperature distribution.
Signs You May Have Weak Airflow
- Uneven temperatures across rooms — some rooms feel significantly colder or hotter than others.
- A noticeable reduction in air pressure coming from vents when compared to normal operation.
- Higher-than-normal energy bills due to your system working harder to compensate for poor airflow.
- Excessive dust accumulation around vents or filters caused by restricted movement of air.
If you notice any of these signs, it’s time to take action before more severe problems develop.
Why Prompt Action Matters
- Increased Wear and Tear on Your System: When airflow is restricted, your HVAC system has to work harder than necessary, leading to premature wear on components.
- Lower Energy Efficiency: Poor circulation forces your unit to consume more energy, raising utility bills unnecessarily.
- Reduced Indoor Comfort: Weak airflow compromises temperature regulation and humidity control throughout your space.
Addressing these issues early extends the lifespan of your equipment while maintaining optimal performance.
Steps to Address Weak Airflow Effectively
- Check filters monthly and replace them every 1–3 months depending on usage conditions (e. g. , pets or allergies).
- Have a licensed technician assess ductwork integrity using tools like smoke pencils or infrared cameras.
- Annual professional inspections ensure all components are clean and functioning correctly.
- A noisy or inconsistent motor may need lubrication, repair, or replacement by an HVAC professional.
- If consistent issues arise due to undersized/oversized units during peak seasons (e. g. , summer/winter), upgrading may be necessary as part of a long-term solution.
| Problem | Recommended Solution |
| Clogged Filters | Replace filters regularly |
| Leaky Ducts | Seal leaks with professional-grade materials |
| Dirty Coils | Schedule coil cleaning |
| Undersized/oversized unit | Consult a professional about upgrading |
By addressing weak airflow proactively through regular maintenance and timely repairs, you ensure both comfort and efficiency over time without compromising indoor quality standards.
- Why Orlando AC Repair is Essential for Your Home’s Comfort and Efficiency
- Top Signs You Need Orlando AC Repair for Your HVAC System
- Tips from a Trusted HVAC Company Orlando for Resolving Common Air Conditioner Problems
- A Comprehensive Guide to Finding the Best Orlando AC Repair Services for Your Needs
- When Should You Consider Orlando AC Repair or Replace Your Air Conditioning System?
- How to Know When to Call an AC Repair Company Orlando FL for a Replacement
- Signs You Need a New AC from a Trusted AC Repair Company Orlando FL